
Spearhead - Sprint 1
Ruins galore
For this semester, I was assigned to the Spearhead team as a 3D artist. Our game will be an atmospheric souls-like focused on quick, tight 3D platforming and combat. Our designer, Christian, has a lot of really cool design materials that show the game's feel for us to build on, and I'm excited to help bring that vision to life.
I'm best at creating hard-surface, non-organic models, so that's my main role for now while the other 3D artists focus on the enemy and player models, giving the programmers and other group members more to work with as they develop core mechanics. Since it's the first sprint for this project, I haven't gotten a huge amount done, but I'm proud of my pace and the quality of the work I've produced thus far.
The first models that I completed were the pieces for the two pillar variants and the two pillar base variants. I began by creating the first variant of both types of pieces, making a whole connected pillar as my starting point. For the first pillar variant, I went with a simple cylindrical shape. To differentiate the bases from the pillar's length, I made the bases more square. I gave all of the edges a single bevel to add some detail and slightly round out the harsher areas. After building the base shapes, I roughly cut out shapes in random areas of the corners of the pillar bases to add a chipping effect that made the models look more dilapidated and worn. Lastly, I used soft selection and a lattice deformer to move areas of the model slightly in different directions, adding variation and making the models more imperfect. To give my team more to work with when building scenery with these models, I used my base pillar and cut it into pieces, creating half pillars, individual bases, and individual pillar lengths, each with variants meant to look broken.

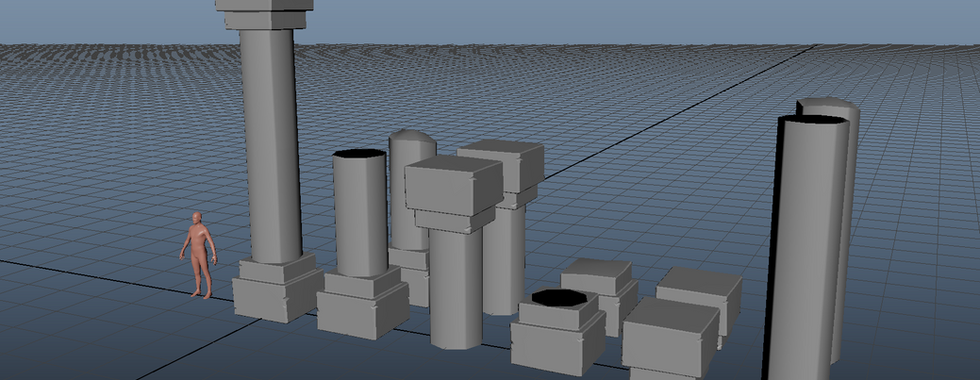



Once I finished these variants, I created a squared pillar-length variant with a cylindrical base variant. I used the same process on these, adding bevelling, chips, and deformation. I also made half, base, length, and broken variants for these.


Once I finished all the pillars, I began creating the ruin wall model. This one was simple, especially because my designer told me the exact dimensions he wanted. I started with a simple cube, stretched it to the right size, then used a similar workflow to the pillars by adding bevelling, chipping, and then deformation. I also added two other variants: a half wall and a narrow half wall.

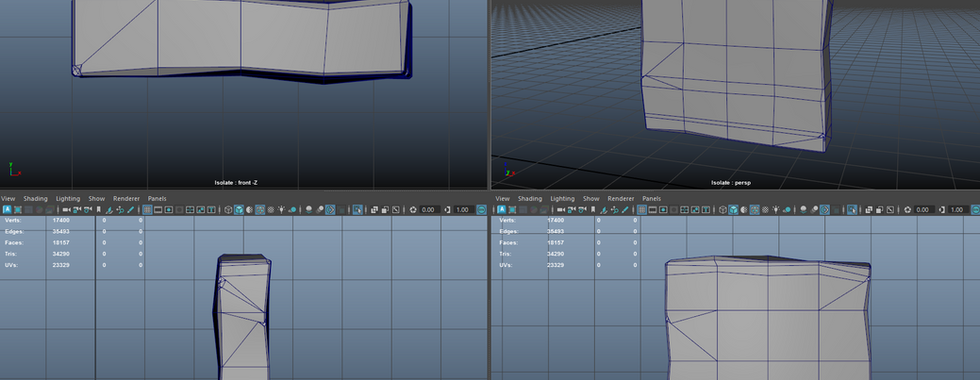


After this model, I created the ruin wall half-arch model. My workflow for these models has been very similar, and this one is only slightly different because of the arch. I started with a simple cube, set the size, and then cut out the arch. I split it in half on the Y-axis to avoid having to select both sides of the object when forming the arch, then shaped it. Once I was happy with this, I simply mirrored it, then did my usual bevel, chip, and deform. I opted to split the finished arch down the middle of the X-axis, with each piece being a separate half that connected flush to the other. This would give my team more freedom to make variations.


The last model that I completed for this sprint was the roof edge model. My designer wanted the models to all be modular, and this one in particular was easy for me to come up with in terms of modularity. Using Elden Ring as a reference, I decided to go with a double flat upper ledge supported by a rounded block underneath. Blocking out the shapes was fairly easy once I figured out what I wanted to make, though it took me some time to refine the support's shape until I was happy with it. Once I was satisfied, I worked to bevel it, which was a little harder because it was more complex than the previous models. I didn't add any chipping or deformation to this one, though I can absolutely go back and add it if needed.


Ultimately, I'm very happy with the models I've produced so far and feel like I'm doing better than I thought I would at making the models look less rigid and perfect. I've also learned that I kind of enjoy straightening UV's by hand, which I hope will assist in texturing my models! I'm excited to see what I get to make next and where the project will go from here!