
Sprint 6 - Paranoia
Simplification, models, and lighting
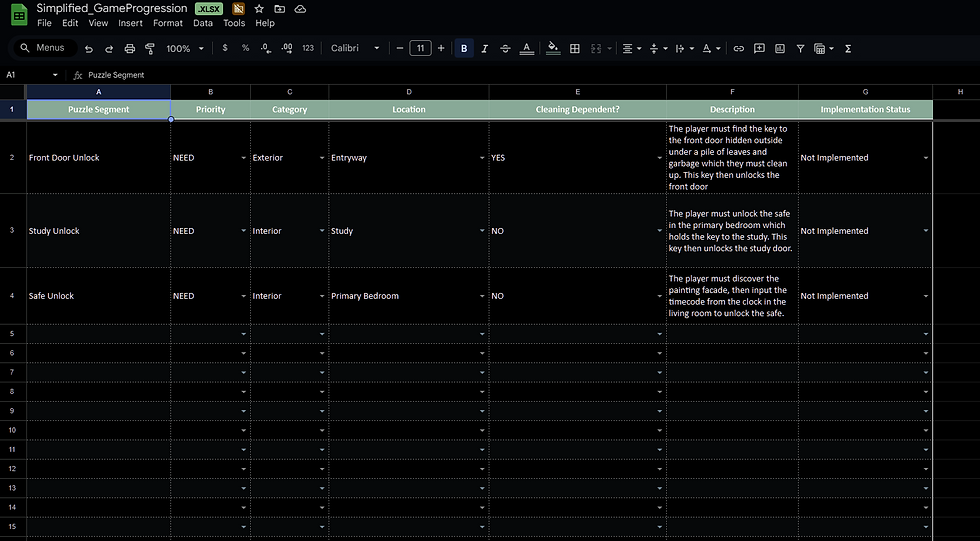
For the second-to-last sprint of this project, I focused on simplifying the scope of the game and its contents, making models for some of the upstairs floors, and adding some lighting to the interior of the house. My group and I wanted to focus on making sure we had the best product possible, and since we were going a bit slower than we wanted because of some programming issues, my producer and I decided to cut the scope of the game down to save time and ensure that what we were able to implement would come out well-polished and presentable. As of our most recent test build, we do fortunately have functional mechanics for cutting grass and collecting garbage, and the house's interior is also now explorable! These things took a little longer to implement than we would have liked due to errors between GitHub and Unreal Engine. From what I understand, attempting to merge one of the programmer's branches into the main development branch was causing some of his blueprints for mechanics to become corrupted and, therefore, unusable. So, we had to do a lot of troubleshooting and finally figured out how to work around the issue. The scope of the game has since been reduced to the grass and garbage mechanics, as well as door-opening mechanics. The number and variety of puzzles have been drastically reduced to three major puzzles, and the narrative triggers have been reduced as well to only what is necessary.
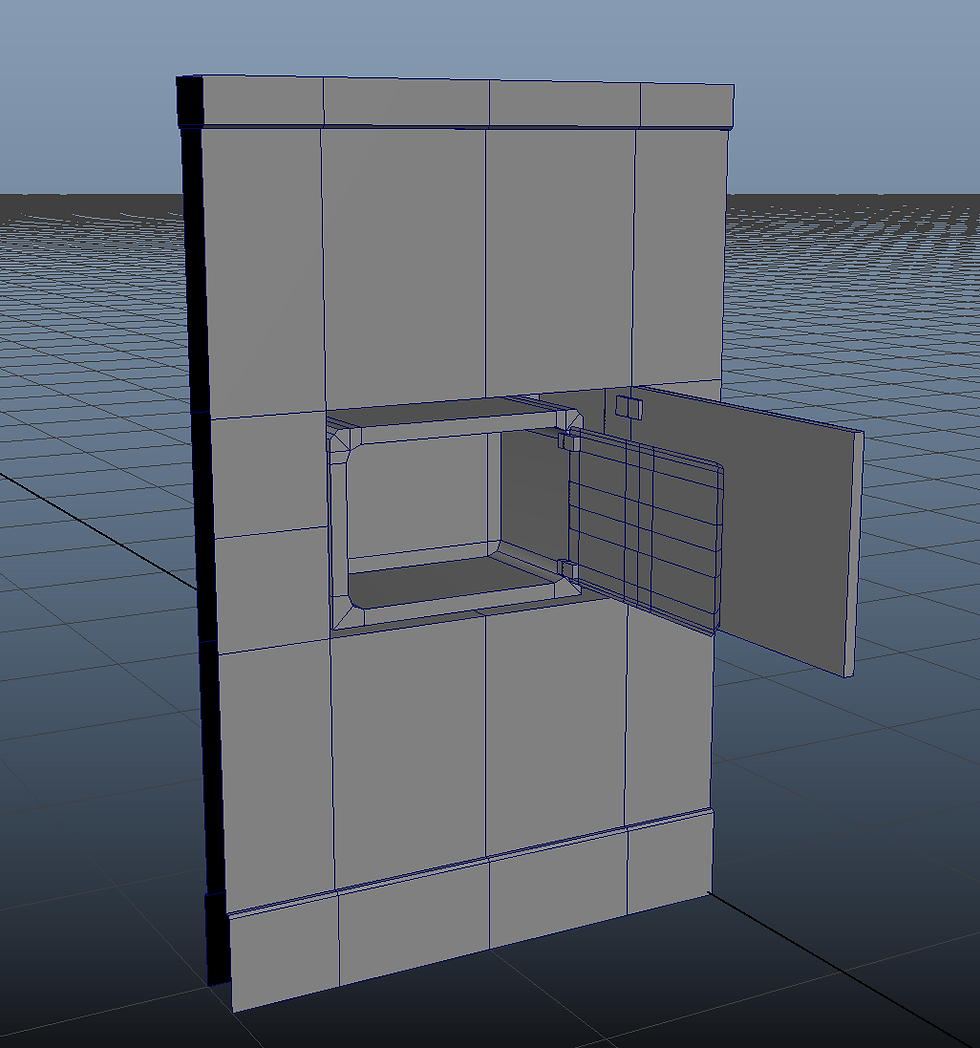
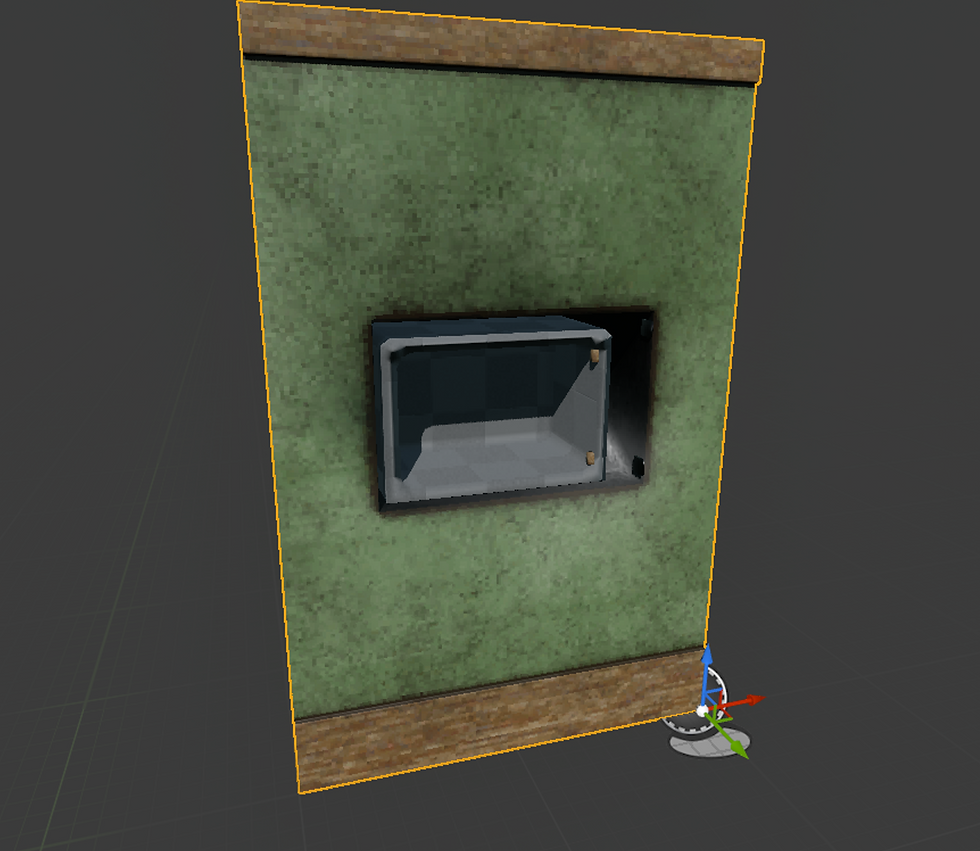
One of my other main focuses for this sprint was making models for the upstairs rooms, particularly the primary bedroom. We wanted to focus on setting up the most important rooms, so we delegated models for the primary bedroom, kitchen, and living room to each artist. I first tackled the most complicated model, that being the wall safe. This one was a little tricky because it requires having separate rotating doors for both the safe itself and the exterior painting facade. I was able to use one of the lead structural artists' modular interior walls as a base to start from, and then cut a hole out that would hold the safe. I then built and placed the safe inside the hole and created both the safe door and the painting door. To make the hinges, I added rectangular pieces to both the doors and their corresponding hinged areas: the inside of the safe wall and the hole in the wall. I then ensured the pivot points for the doors were in the correct locations and that they rotated correctly. I did my best to match the existing wall textures, and so far, it seems to have been successfully implemented.

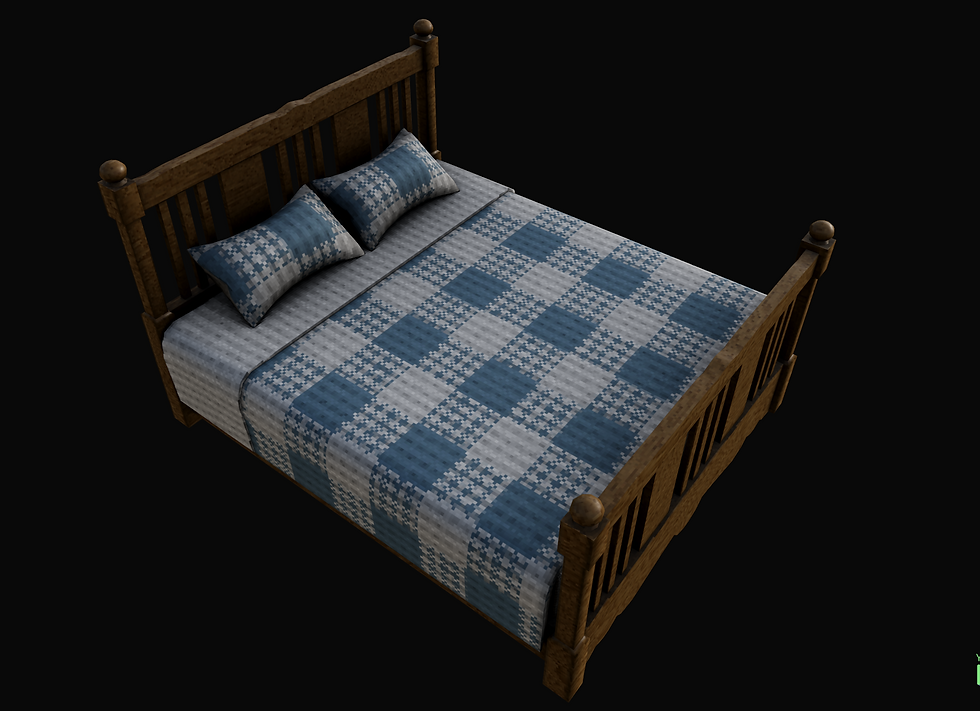
After that, I made a model for the bed. This was fairly straightforward when it came to creating the frame. It was mostly just a lot of extruding and mirroring, focusing on one half of the head and foot, then mirroring that along the x-axis. The challenging yet fun part of creating this model was making the sheets and pillows. I've never made any soft-surface models or worked with fabric structures before, so this was an interesting learning experience. I decided to make the sheet by creating a plane and using Maya's nCloth system to simulate it lying on the mattress. I then converted that nCloth plane into a static mesh and extruded it to make it a bit bulkier, like a blanket instead of being extremely thin. For the pillows, I used a similar technique: creating a rectangular mesh, then using the nCloth system with increased force to simulate the mesh expanding into a pillow-like shape. I also made sure to reduce the amount of polygons for all of the nCloth meshes to ensure it fit the style of the game while still adhering to their core shape.


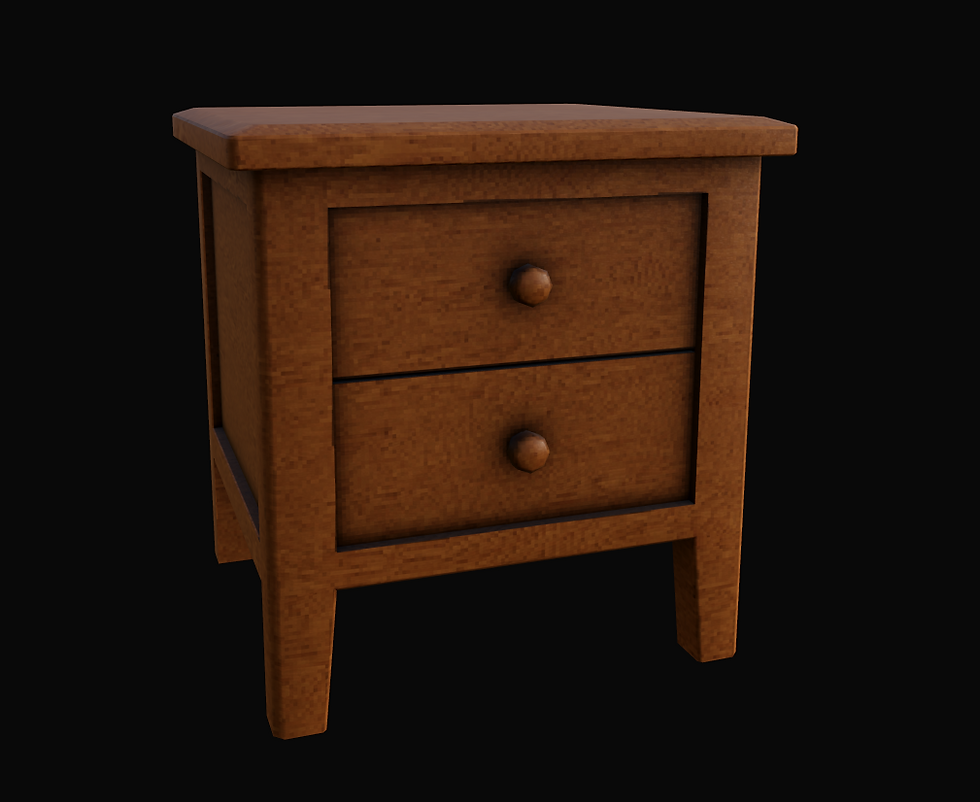
After making the bed, I also made a simple nightstand model. It's nothing particularly special, but I think it fits in with the rest of the furniture and decorations made so far.
I was also tasked with creating models of the carpet variants we wanted to place throughout the house. For these, I just used standard plane and disc meshes and then used photos of real vintage carpets as textures. Normally, this might look a little strange, but due to the pixelization of the art style and the inspiration being early-2000's limitations, it looked right at home. I also included variants of each carpet size and shape to ensure a good variety of options for the structural artist to choose from when laying out the decorations.


Lastly, I added simple lighting to some of the interior rooms, using premade Unreal lights with reduced power to mimic the feel of old incandescent bulbs.


Overall, I'm very happy with how my work turned out, and I'm hoping to finish strong with this project despite the issues we have encountered with progress.